FAQ
-
Q. I cannot connect to Bluetooth properly in iOS/Android.
A.
1:Open the mini Link app and tap the “Settings” icon
 in the upper right.
2:When the settings menu screen opens, tap “Bluetooth settings” at the top of
the list.(Turn on Bluetooth on your device if it is not activated already.)
3:When the printer is turned on, printers that can be connected are displayed as
“INSTAX- ********” under “Devices that can be connected”. Tap the “Connect” button
displayed to the right of the printer. Once connected, the printer is displayed as
INSTAX-******** under “Device connected”. Connection is now complete.
【Watch video】How to connect to Bluetooth(iOS)
【Watch video】How to connect to Bluetooth(Android) -
Q. Bluetooth connection cannot be established with iOS.
A. Bluetooth connections may not work correctly in the Link app if you connect from the settings screen of your device. Be sure to make Bluetooth connections from the Link app.
If you have made a Bluetooth connection from the settings screen of your device, disconnect it from the settings screen of your device too. -
Q. Bluetooth connection cannot be established with Android.
A. Bluetooth connections may not work correctly in the Link app if you connect from the settings screen of your device. Be sure to make Bluetooth connections from the Link app.
-
Q. How many smartphones can be connected together with the printer?
A. One. To connect another smartphone, you will need to unpair the smartphone that is currently connected.
-
Q. Why does the app ask for access to location services, etc?
A. Location needs to be enabled in order to connect to the printer through Bluetooth.
-
Q. How can I find out the latest firmware?
A. You can confirm this by checking "Check Version Updates for Printer" in the app settings when the printer is connected.
-
Q. I want to update to the latest firmware.
A.
1:Open the mini Link app and tap the “Settings” icon
in the upper right.
2:When the settings menu screen opens, tap “Check Version Updates for Printer”.(Connect the printer if it is not connected already.)
3:If new firmware update information appears, follow the instructions on the screen to update. -
Q. Which formats are supported by Video Print?
A. Guaranteed extensions : The original format of videos taken in iOS or Android
(mov for iOS, mp4 for Android)
Length of video : Under 3 minutes -
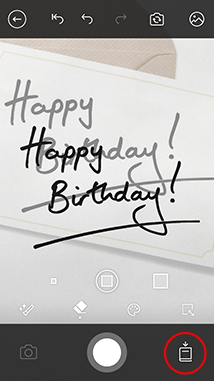
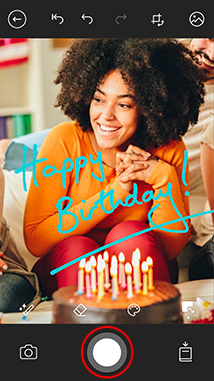
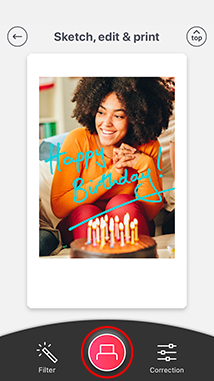
Q. How do I use Sketch, edit & print?
A.
1. Buttons in the app
-
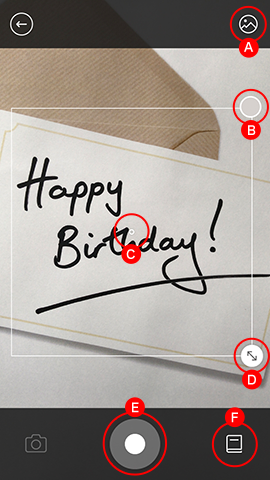
A:Select a photo from your smartphone
B:Displays the color of the item you want to import
C:Align your caption/text with your photo
D:Adjust the area to be imported
E:Import
F:My Collection opens -
G:Remove noise
H:Eraser
I:Palette
J:Move/Resize
K:Back to camera
L:Save Image
M:Save to My Collection
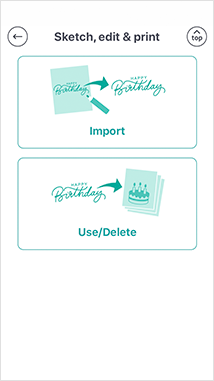
2:The "Import" and "Use/Delete" features can be used in Sketch, edit & print.
Importing
-
STEP 1

Tap "Import".
-
STEP 2
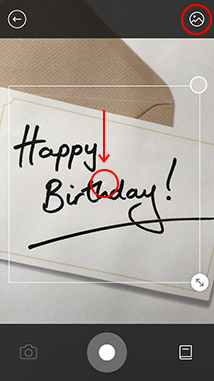
Align the circle in the center of the frame with the item you want to import (sketches, text, etc.) Tap the top right corner to import sections of photos on your smartphone.
-
STEP 3
The circle in the top right corner of the frame shows the color of the item to be imported.
-
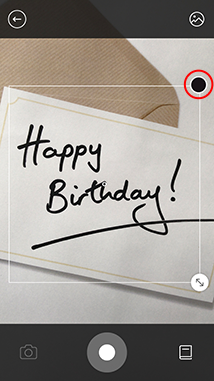
STEP 4
Tap the bottom center button to complete import.
-
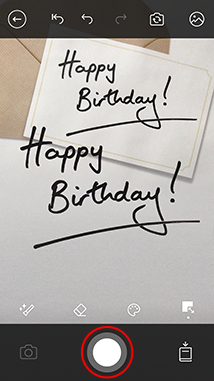
STEP 5
Tap the bottom right button to save imported picture to your collection (save up to 30 photos).
-
! POINT
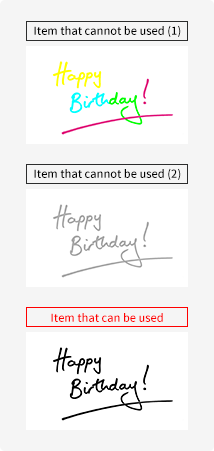
1 If an item has multiple colors, it may not be possible to import the whole item.
2 We recommend importing items that have a high contrast with their background.
Using and deleting items (To use a saved item (handwritten text or hand-drawn illustration))
-
STEP 1
Tap "Use/Delete".
-
STEP 2

Tap the item you would like to use from your collection. Camera will automatically launch when after you make your selection.
-
STEP 3
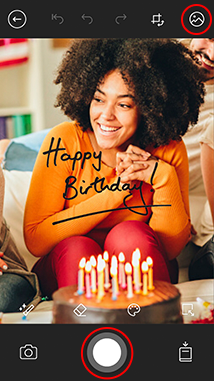
Tap the bottom center button to take a photo or choose a saved photo from your smartphone by tapping the top right circle on your screen.
-
STEP 4

Resize, rotate or adjust the colors on your imported item by using the palette mark.
-
STEP 5
Tap the bottom button to open the printing screen.
-
STEP 6
Tap the print button!
-
-
Q. How many people can use Party Print together?
A. Up to five people.
-
Q. Which models of the X Series camera can be connected, and how can I connect them?
A. All X Series cameras that are compatible with the FUJIFILM Camera Remote app are supported.
To connect:
1:Install the FUJIFILM Camera Remote and mini Link apps.2:Select the image you want to print in the FUJIFILM Camera Remote app.
3:After selecting the image to be printed, tap the “Link” icon displayed in the lower right.
4:Tapping the “Link” icon launches the mini Link app. You can now start printing.List all compatible X Series cameras - The FUJIFILM X-A7 (and any others) do not need the smartphone app to transfer photos to the mini Link printer. Click below for instructions on how to connect the X-A7 (and any other X series cameras) to the ,mini Link printer.
http://fujifilm-dsc.com/en/manual/x-a7/ -
-
Q. What do the colors of the LED lights and the way they light up mean?
A. Please see the table below for explanations.
Normal operations White Flashing Updating the firmware of the printer Flashing in
wavelike formConnecting to the app Orange Lit up Connecting to the app - Fun Mode Blue Lit up Connecting to the app - Print Mode Purple Lit up Reprinting Pink Lit up Connecting to the app - instax Camera Mode Rainbow Flashing Transferring image Charging Red Lit up Battery low Flashing Battery low (charging) Green Lit up Charging completed Flashing Charging almost completed (charging) Errors Yellow Lit up Critical error occurred (occurs when battery level is 0) Flashing
fastNon-critical error occurred (occurs when a user attempts to print when there is no film left, when a film printing error occurs or when there is an error during ejection of a print) Flashing
slowlyMinor error occurred (occurs when there is no image or when a user attempts to reprint when there is no film left) -
Q. What functions can be used by moving the printer?
A. The following three functions can be used.
instax Camera mode Zoom in → tilt the printer inward
Zoom out → tilt the printer outward
Capture → press the power buttonReprinting Press the power button while the printer is
pointing downwardSwitching between Print
Mode and Fun ModePrint Mode → Stand the printer vertically.
Fun Mode → Lay the printer horizontally. -
Q. The printer does not start when I press the power button. No LEDs are lit.
A. Charge the printer first. It takes around 2 hours to fully charge the printer.
-
Q. Where is the power button?
A. The power button is the area in the center on the front of the printer with "instax" written on it.
-
Q. What should I be aware of when disposing of the printer?
A. You will need to follow your country's regulations when disposing of the printer.
If you are unsure, please contact our support center. -
Q. The printer does not reprint and the light is blinking in yellow.
A. There is no reprint image. Reprint images are cleared when the printer is powered off.