Scanning Guide
Try the techniques below if you're having trouble getting a good scan.
- Scanning tips -
Please scan with the following points in mind
Ensure the print is as centered as possible and free from clutter.


Place the thickest part of the film border's edge at the bottom of the screen




Place the print on a contrasting color to the film border for best results


How the instax™ photo should look when scanning.


- How to scan -

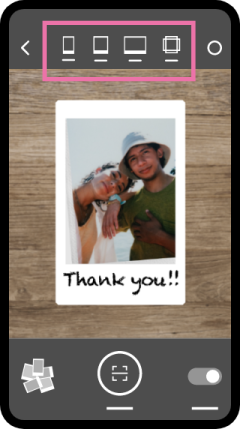
Step1
Select the print size
Step2
Place the thickest part of the film border's edge at the bottom of the screen, and place the print on a contrasting color background to the film border
Step3
Once the green frame is displayed around the print, press the START button at the bottom of the screen
*Screen may differ from the actual screen.
- Useful features -
Remove reflections
Remove reflected light from your instax™ photos.
Adjust corners
Manually adjust the four corners of your instax™ photos to correct distortion in the scan.
Magnification settings
Adjust camera magnification settings. This makes it easier to avoid casting a shadow by allowing you to scan with more distance between the instax™ photos and your smartphone, resulting in a clearer scan.
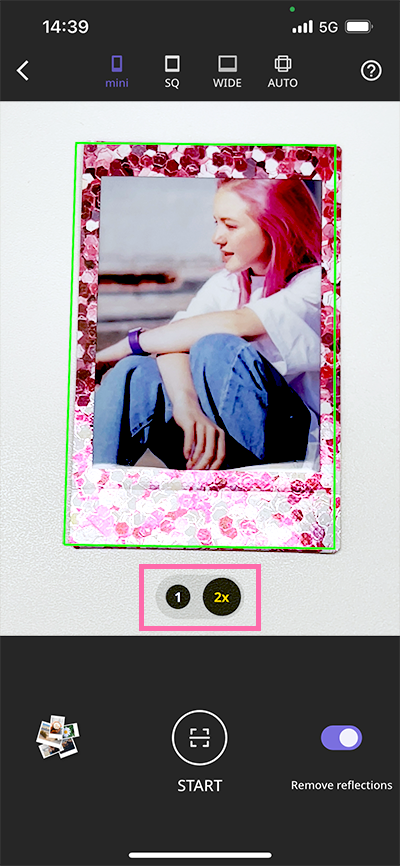
*Screen may differ from the actual screen.

- *Apple and the Apple logo are trademarks of Apple Inc., registered in the U.S. and other countries and regions. App Store is a service mark of Apple Inc.
- *Google Play and the Google Play logo are trademarks of Google LLC.


